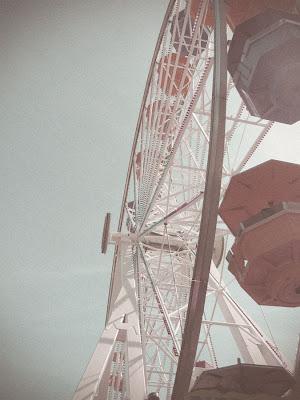
 Lately I've noticed that desaturated photographs with a vintage camera feel are popular. I decided to try to recreate the look with an ordinary digital photograph. The photo above started out like this:
 The transformation is pretty easy to achieve using Adobe Photoshop. The following tutorial uses adjustment layers to make the transformations easily un-doable. If you are new to PhotoShop, I highly recommend learning to use adjustment layers and masks. Masks will allow you to concentrate adjustments to certain areas of a photo.
How to Create a Faux Vintage Photo
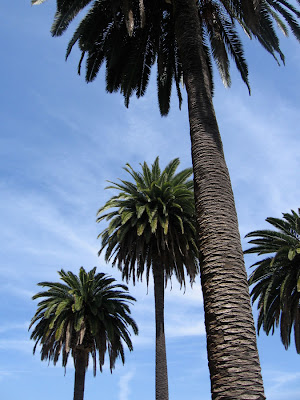 Step 1
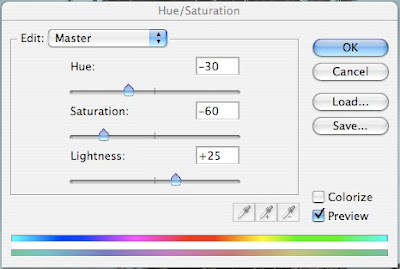
Open a photo in Adobe PhotoShop. Create a Hue/Saturation adjustment layer by clicking the adjustment layer icon in the Layers palette. Fill in the values shown below and click OK.
 Step 2
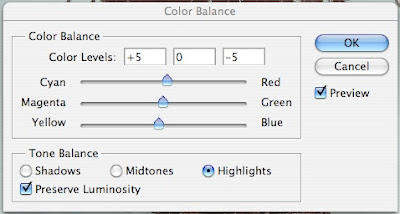
Create a Color Balance adjustment layer by clicking the adjustment layer icon in the Layers palette. Adjust the color, increasing reds and yellows for each Tone Balance option. Sample adjustments are shown below.
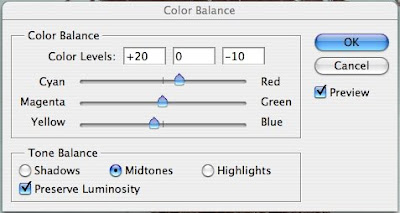
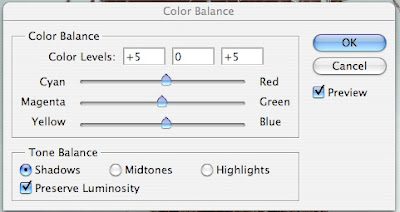
Step 3
Duplicate your photo layer by clicking and dragging the layer to the New Layer button at the bottom of the layers palette. Go to the Filter menu and select Distort>Lens Correction. Drag the Vignette Amount slider all the way to -100. This will darken the corners of the photo. Click OK. Make the copied layer 80% opacity in the layers palette.
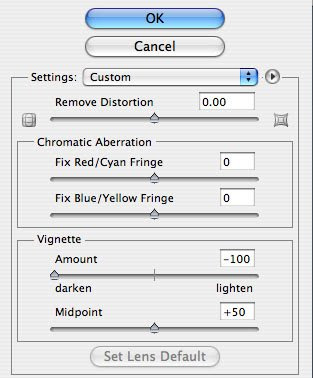
Step 4
With the copied layer selected, from the Filter menu select Noise>Add Noise. Click OK. Save your photo as a .psd file. If necessary, adjust the color by double clicking the adjustment layers and changing the values.

To make another faux vintage photo, open a second photo in PhotoShop. Select your altered photo. In the layers palette shift-click both adjustments layers and drag them to the second photo. Continue with Steps 3 and 4 to complete. Adjust color adjustment layers as necessary to achieve your desired result.

very interesting...kind of reminds me of lomography..thanks for the tutorial!
ReplyDeleteWhat a clever tutorial - thank youQ
ReplyDeleteThanks for the tips! I used them here...
ReplyDeletehttp://flic.kr/p/9DjBYy