

Every designer needs a sketchbook. There's nothing quite like putting actual pen (or pencil) to paper and drawing out the vision you have in mind. It's even better when your sketchbook is super pretty to look at. Patterned fabric is one my favorite things in the world and this sketchbook cover is a great way to showcase a precious little piece of fabric. Once you get started, you'll want to cover all the sketchbooks and day planners you can get your hands on. This would certainly make an awesome Valentine's Day gift for your favorite designer, artist, note taker or list maker. Enjoy!

DIY Fabric Sketch Book Cover
Supplies:
- Wire ring sketch book with removable cover (This is important if you want to replace the entire cover. A coil binding will not work.)
- Light to Medium Weight Cotton Fabric, cut to same size as cover
- Tag Board or Card Stock
- Tacky Glue
- Hole Punch
- Rotary Cutter or Exacto
- Clear Contact Paper
DESIGN TIP
Before you cut your fabric, fold it into the finished size. Does your fabric look good in a swatch this size? Small print fabrics are better suited for a small sketch book while a large print fabric would work better on a large sketch book. If you have a border print fabric or a print with a lot of variation, you might want to "fussy cut" the fabric so that you are using the perfect section of fabric for your cover.

Step 1:
Remove the cover from the sketchbook.

Step 2:
Cut a new cover from tag board and mark the holes for the binding using original cover as a guide. Use the hole punch to make holes where marked. (You can wait until later to punch the holes if your hole punch is particularly strong.)
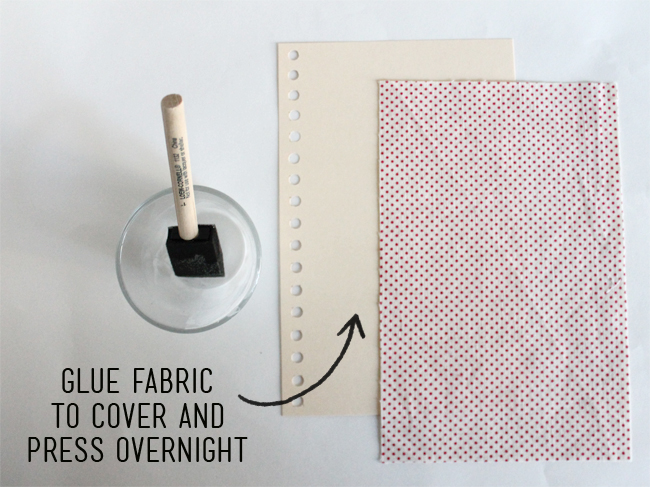 Step 3:
Using Tacky glue thinned with a few drops of water, brush glue over tag board. Adhere fabric to tag board and set under heavy books overnight or until very dry and flat. (Don't forget to iron your fabric before gluing it down!)

Step 4:
Cut a piece of contact paper 1 inch larger than the cover on all sides. For example, if your notebook is 5 x 8 inches, cut your contact paper 7 x 10 inches. Cut away the corners of the contact paper and adhere to the fabric side of the sketchbook cover. Smooth with a bone folder.

Fold the excess edges of the contact paper over to the back side of the sketch book cover. Pull the contact paper taut with one hand and use the bone folder to smooth it onto the sketchbook cover starting at the edge and moving inward.

Step 5:
Cut a second piece of contact paper just large enough to cover the back area that is not already covered. Adhere and smooth with a bone folder.
Step 6:
Using a hole punch, punch holes through contact paper and fabric where marked. You may need to trim a bit with scissors. Put the cover on your sketchbook and you're ready to go!

VARIATIONS:
- Use scrapbook paper or wrapping paper instead of fabric
- Make a paper collage
- Stencil a design using fabric paint before covering with contact paper
- Embroider an initial through all layers
- Add a paper name plate
- Skip the fabric and use a patterned contact paper

I hope that you enjoy this little project. It's so much fun to personalize the things we use in every day life and make them a little more beautiful. There really is no good reason to jot down your designs in a generic sketchbook when you can have one as lovely, and dare I say it, as inspiring as this.
--
Follow along with me here:
0 comments:
Post a Comment
Thank you for visiting my blog! I love getting comments and always visit links when available.
Note: Only a member of this blog may post a comment.