
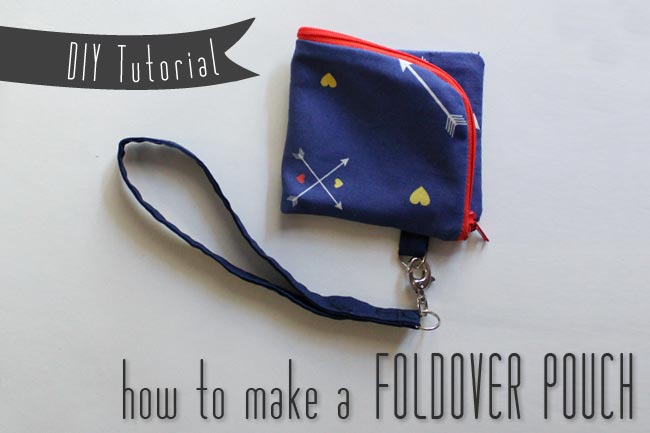
This fun little pouch is the perfect size to carry just the bare essentials. Or unfold it and you have a pencil pouch. Don't want to carry a purse? Just slip the wrist strap on and you're ready to run about town. The removable wrist strap allows you to move the pouch from your bag to wrist with ease.

Read the tutorial and download the pattern after the jump.

Fold-over Zippered Pouch
Supplies
Main Fabric: One 8 x 8 inch swatch for pouch body
Paper Pattern (download here)
Contrast fabric: One 2 x 2 inches for loop, One 2 x 15 inches for wrist strap
1 7" zipper
1 Sew-On Snap
1 Metal Clasp
2 Sturdy 1/2 inch Jump Rings


Instructions:
Step 1:
Download your paper pattern. Print with page scaling set to "None". You can also make your own pattern by drawing a 4 x 8 inch rectangle with one corner rounded. Cut two pieces from your fabric swatch. Make sure that when you put the fabric wrong sides together, the shapes match.
(Confession: I actually cut mine a little bit bigger than the pattern as you can see from the white edges below. The size of this pouch is very adjustable. The one I showed you yesterday was cut 5 x 7 inches. Get a big zipper and you could make a big old pouch.)

Finish the edges of your fabric using a narrow zig zag stitch.
While you're at the machine, fold the strap piece in half, right sides together with short sides meeting. Stitch a 1/4 inch seam along short end. Press seam open. (If your rings do not open, slide one on now.)

Fold the strap in half lengthwise and press. Fold raw edges to center, meeting first fold and press again. Topstitch through all layers. Attach jump ring and lobster clasp to strap. Above ring, stitch wide zig zag to hold jump ring in place.


Pin zipper along one curved edge with the right side of fabric facing the outside of the zipper and aligning top of zipper 3/8 inch from edge as shown.


Fold 2 x 2" contrast fabric in half and press. Then fold raw edges to inside, meeting first fold. Top stitch through all layers. Fold in half to make a loop and pin to side of pouch about 2 inches from the bottom edge. (If your jump ring does not open, slip it on the loop now.) Baste in place. This loop will hold another jump ring so you can attach the wrist strap.

With right sides together, stitch around remaining sides using a 3/8 inch seam allowance.

Open zipper and turn right side out. Attach jump ring to small loop. Then clip clasp on wrist strap to jump ring.

Now you're all done! I hope you enjoy your new pouch.
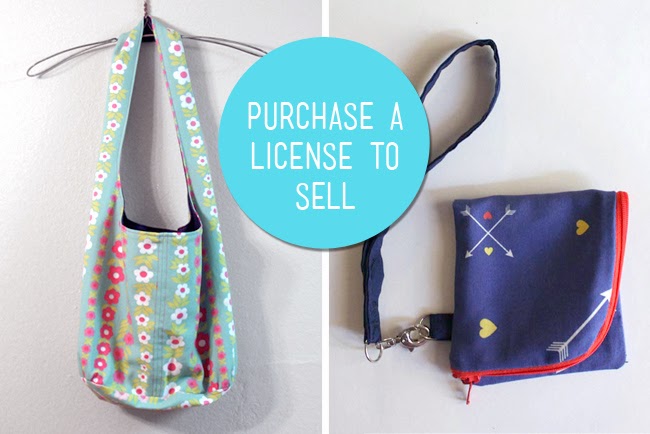
UPDATE November 2013:
Are you interested in making these zippered pouches to sell in your etsy shop, online store or local craft fair? I now offer licenses to sell so that you can do just that. Head over to my shop to purchase. It's a one time purchase and you can sell as many as you want. Thank you!
Just GRATE!seems to easy!
ReplyDeletethanks for sharing!!!
Cheers from Argentina!
This is fabulous!! TFS!! Great tute!! Stopping by from Craft-O-Maniac linky party and your newest follower.
ReplyDeleteHere is what I shared: http://craftybrooklynarmywife.blogspot.ca/2012/09/another-fur-baby-coat.html