Showing posts with label accessory. Show all posts

DIY Rope Handle Tote


Would you believe that I started this bag over a year ago? If you're the procrastinating kind of crafter that I am then yes, you can easily believe it. This was one of those projects that just stalled out, got shoved in a bin somewhere and wallowed. I was all ready to finish it back in August of 2012 when I failed attaching the eyelets. I was a little afraid to hammer hard on any of the surfaces in my apartment and trust me those eyelets need a good beating. So, a few months ago I took the bag and eyelets to my parents house, borrowed a brick from my Dad and hammered away. And voila! Eyelets.


Winter Wardrobe No. 6 – Triangle Bag with Tutorial

A while ago, probably more than a year ago, I was in this hip boutique that featured Japanese products in a very hip area of town, when I spied a very cool tote bag. It was sewn on the bias and made a triangle shape. It was so cool and looked deceptively simple. I went home and started playing around with fabric and even paper. And then I found this tutorial from Between The Lines and thought "wow! she's really figured it out!". And now at last I've made my own Triangle Bag.


Moodboard – Classic Bags under $50


The right bag can make or break an outfit which is (partly) why I change out my purse a few times a week. The other reason I choose one bag over another is just how much stuff I need to carry around. So it's always good to have a nice selection in your closet so you can pick just the right one for the occasion. Today I've found a bunch of awesome bags all for under $50 so you can stock up and not break the bank.

Top Row from left: Crossbody Bag  //  Envelope Crossbody  //  Red Crossbody  // Black Hobo
Middle Row: Camel Tote  // Vegan Saddle Bag  //  Red Messenger Bag
Bottom Row: Grey Tote  //  Mini Duffle  //  Reverse Denim Tote

Related:
--
Follow along with me here:

DIY Tutorial – Hand-Warming Muff for Dottie Magazine


Today I'm really excited to announce a new collaboration with Dottie Magazine. Dottie is a new online fashion and lifestyle magazine. Their first issue went live recently and it is gorgeous and inspiring. I was thrilled to be asked to contribute a project to their website. When I was a little girl, one of my favorite dress up pieces was a white faux fur muff. I always felt glamorous and girly when I wore it. So to celebrate the winter season I developed an easy DIY tutorial to make your own hand-warming fleece and flannel muff. This is an easy sewing project that doesn't require a sewing machine and is sure to keep your mitts nice and toasty all winter long. I hope you enjoy!

--
Follow along with me here:

Moodboard – New Year's Eve Accessories under $50

Have you picked out your New Year's Eve outfit yet? Are you going to make a day to night transformation this year? Or maybe make an old outfit look new again? Well, choose your accessories wisely and you are good to go. I've found some great sparkly gems all for under $50 that sure to make your New Year's outfit to-die-for.

Top row (from left): Colorblock clutch  //  Pyramid Earrings  //  Crater Ring  //  Green Drop Earrings
Middle row:  Gold Heels  //  Color Stone Ring  //  Stone Bib Necklace  //  Gold Fringe Earrings
Bottom row: Dimpled Bib Necklace  //  Green Glass Bracelet  //  Gold Stretch Belt  //  Silver Clutch

Related:

--
Follow along with me here:

Free Pattern – Chunky Cable Knit Hat (Revised)


About a year ago, I posted this free pattern for a chunky cable knit hat. Just in time for the winter, I've updated the instructions, worked out some kinks and created a large size hat as well. So, if you've been afraid of knitting cables, it's time to give it a shot. They're not that hard to do and look so very impressive. This pattern is knit flat and then sewn together. It knits up pretty quickly in just a few hours so you can make one for yourself and everyone in the family. 

DIY Tutorial – Turban Headband

You know those days when your hair looks less than stellar (as in a tangled funky mess) or you desperately need a haircut and just want it off your face (me right now)? Those are the days when you need a chic turban headband to cover up the mess and make you feel like a 1940s movie star. 


As soon as I saw this headband from Anthropologie I knew I wanted to try my own version. I love the graphic, tribal print on the fabric and the simple loop at the top. This project is very easy to make, only taking about an hour to complete. The turban style look is created by looping two pieces of fabric together at the center of the headband. It's a cool, retro look and really easy to replicate. The fabric I used here has a hint of animal print flair in it mixed with the cool blue colors I love so much.


DIY Tutorial – How to Make a Tassel

When you think of tassels you probably think of winter ski caps or heavy window coverings. But they can be used for many more things, even in the summer! Tassels can be used as part of a boho cool necklace, on the corners of a tablecloth, as a keychain or zipper pull. Fun right? Lucky for us they're super easy to make. You probably already have all the materials you need.


DIY Tutorial – Half Circle Zip Pouch (with free pattern)


Whether hitting the road or hitting the town, every girl needs a little pouch or two or three to carry all of life's little necessities. Fill them up with with jewelry and makeup, your favorite art supplies or a few snacks, then throw it in your purse and you're ready for the day. Everything you need will be easy to find and readily accessible. These fun little pouches use just a few pieces of fabric and can be made very quickly. This is a great project for featuring a little swatch of fabric that you love so much but just can't figure out where to use. I used swatches for fabrics I designed on Spoonflower. Head on over there and you can purchase your own fabrics in this arrow and heart designs.

DIY Tutorial - Polka Dot Scarf Guest Post on PopCosmo

Today I'm super excited because I have a guest post on PopCosmo of a really fun and easy DIY Polka Dot Scarf. This scarf is so easy to incorporate into your wardrobe. I've been wearing mine pretty much non-stop since I made it. It dresses up a plain outfit and pairs well with other prints. Kim and Chloe are great ladies and it's been awesome to collaborate with them. About a month ago I posted about their DIY Camera Strap here on Lula Louise. So head on over and check out my tutorial. It's seriously going to kickstart your summer.

Go check out the tutorial on PopCosmo!

--
Follow along with me here:

Guest Post – DIY Camera Strap from Pop Cosmo


Hi Lula Louise friends, we are Kim and Chloe from Popcosmo. We're a mom (Kim) and teen daughter (Chloe) blogging together showing that klutzy gals can wear heels, and that teens & moms peacefully share clothes and ideas... most of the time. We blog about fashion, DIY projects, and anything else that catches our fancy. Beth asked us to fill in while she's off basking in the sun somewhere springy with lots of fruity drinks and sandy shores (we're totally making that up, we just hope she's somewhere fun!), and we love Lula Louise so much that we were honored to introduce ourselves to you, her BFFs in the blogosphere, with our latest DIY. 

Our DIY Camera Strap is completely customizable with your choice of trim, and Chloe chose a Coachella looking sunflower trim. I wanted something ready for a blogfest or a friend's wedding and everything in between, since our camera tends to go everywhere we go! Which brings us to the main reason this ended up being our most fun DIY to date: the strap is interchangeable (just clip it) and since they are so easy to make, we each have our own! Next up: our own camera. (Hey, a gal's gotta dream!!)


Hope you enjoy the DIY and come hang out with us at Popcosmo anytime. We love chatting with everyone who connects with us via comments on the blog, Twitter, Facebook, Bloglovin', etc! Just ask Beth, we met at #BlogBrunch chat and bonded over a shared love of gorgeous blogs and do-able DIYs.  Thanks Beth and hope to see y'all soon at Popcosmo.

How To Wear Brown Leather Accessories


My favorite accessories are made of brown leather. I love how they look paired together. They have a way of pulling an outfit together with sophisticated no-fuss style. The best way to highlight your accessories is with a simple dark colored blouse/pant combo.

Here are my picks clockwise from top left:

1. Tubular Skinny Braid Belt from Lands' End Canvas
2. Silk Henley Blouse from L'Agence
3. Moto Vintage Skinny Jeans from TopShop
4. Transport Tote from Madewell
5. Enzo Angiolini 'Saylem' Riding Boot from Nordstrom
6. Wishbone Necklace from etsy seller lilabelledesign


--

Follow along with me here:

DIY Camera Wrist Strap Tutorial

Maybe your camera's wrist strap is lost or broken or maybe you just want to add a little extra flair to your favorite point and shoot. Either way, here's a quick and easy tutorial for making your own camera wrist strap. 


Craft from the Past – Felted Crochet Beach Bag with Free Pattern

Accessories month is coming to a close but it's not too late to share one more project. I crocheted this bag a number of years ago (even longer ago than this one). Lucky for you I wrote up a pattern for it. It's been available on my patterns page as a pdf download but now here it is for you online.


Vintage Pattern Inspiration – Hats and Belts


There's nothing quite as delightful as a vintage pattern. They have the ability to take you back to another era – when women wore elegant hats and gloves and matching handbags. McCall's 6515 features four gorgeous smocked hats. Couldn't you see Audrey Hepburn in one of these?

I somehow ended up with a lot of these in my stash – some from my grandma and some from mom. See lots more after the jump. If you need even more vintage pattern inspiration be sure to check out the Vintage Patterns wiki.


Thursday Thriftday – August 30

Here is a fun little studded purse in a cheery sky blue and a sophisticated red wallet (I love the passport pocket). I found the purse at a local thrift store and the wallet at an estate sale near my house. I love the bright red color of the wallet. I might have shared these before but couldn't resist sharing again. These two are a great pair, sleek little thin rectangles ready to take you wherever you need to go.


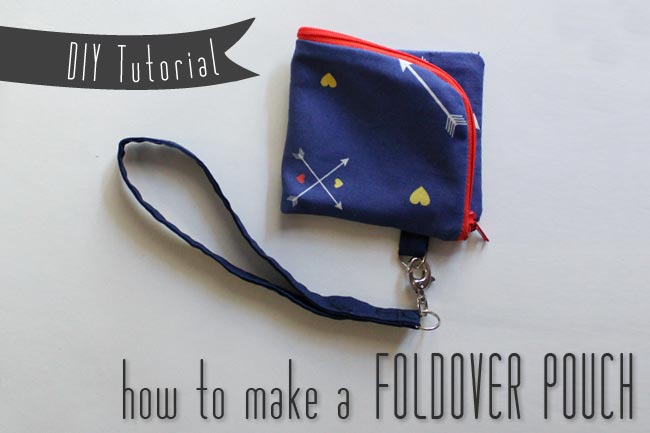
DIY Tutorial and Pattern – Fold-over Zippered Pouch with Wrist Strap


This fun little pouch is the perfect size to carry just the bare essentials. Or unfold it and you have a pencil pouch. Don't want to carry a purse? Just slip the wrist strap on and you're ready to run about town. The removable wrist strap allows you to move the pouch from your bag to wrist with ease. 

This pouch is the perfect size for using a single swatch of fabric. The fabric I used here is a swatch from a fabric I designed and had printed by Spoonflower. Visit my shop on Spoonflower to see the whole collection. This little pouch is really surprisingly quick to stitch. Within an hour a two, you'll be ready to go!

Read the tutorial and download the pattern after the jump.

DIY Zippered Fabric Pouches

Zippered pouches are an pretty easy and satisfying sewing project. (There are lots of tutorials out there on the interwebs if you need some help getting started.) You might recognize the fabric above from my adventures in fabric dyeing earlier this year. If not, you should check out my Ombre Clutch Tutorial. A little gold fabric paint turned the up the fabulous quotient.

The fabric for making a zippered pouch is pretty darn cheap but the cost of zippers at a fabric can add up. So, a little tip from me to you: Thrift stores are a great source for zippers. They usually cost from 10 to 25 cents and often have lots of colors. I've stocked up over the years and now have a pretty decent stash of zippers. If you see an invisible zipper, snap it up. Those ones can cost even more.

DIY Fold-Over Zippered Pouch with Wrist Strap

Here is a fun little pouch I whipped up using vintage fabric and zipper. The zipper curves around the top of the pouch then it folds over and is held in place with a sewn-on snap. Tomorrow I'll be posting a how-to tutorial and a free pattern download! But, I couldn't resist showing you a little sneak peak.


Cute, isn't it?

Craft from the Past – Reversible Lined Crochet Bag

Accessories and Embellishment is coming to a close and I'm frantically trying to finish some projects. So, trust me this week is going to have about twice as many posts as usual. (yay!) Today's post is actually a really old project (originally blogged here) that deserves a fresh spotlight.

I crocheted this bag using a recycled yarn. I started with the bottom of the bag and worked my way up in circles. Each handle is two braids twisted together. After crocheting, I fashioned the lining of the bag and gave it pleats around the rounded opening to provide shape. The intention is that the bag is reversible. I do really like the shape of the bag but have rarely used it. 


Crochet is probably the craft that I am least confident in. I learned to knit first and it was hard to figure out crochet. Once I get in the groove of it though, it's ok. Do you prefer knit over crochet or vice versa?